Woodworking 101
After Thanksgiving I went to middle of nowhere Tennessee (Tazewell) to visit family and take an introduction to hand tools woodworking from my relative Harold who is a master furniture maker and award-winning artisan. Stella and I visited last year during our big winter road trip as well and we had a grand time. This year Stella went home to Malone though so I was solo for this portion of the trip.
The first day we looked at the tools I brought. My experience has been almost exclusively power tools and plywood so far, but I picked up a single jack plane, a set of chisels, a marking knife, and a few other basic tools. The plane was essentially still new so we spent a while sharpening the chip breaker and the blade and conditioning the base to smooth out the material, putting a curve to the corners, apply wax to the base, etc. By the end of the work day I was cranking out lovely thin shavings. The plane actually worked great all week and we didn't end up sharpening it again until just before the final finish work.
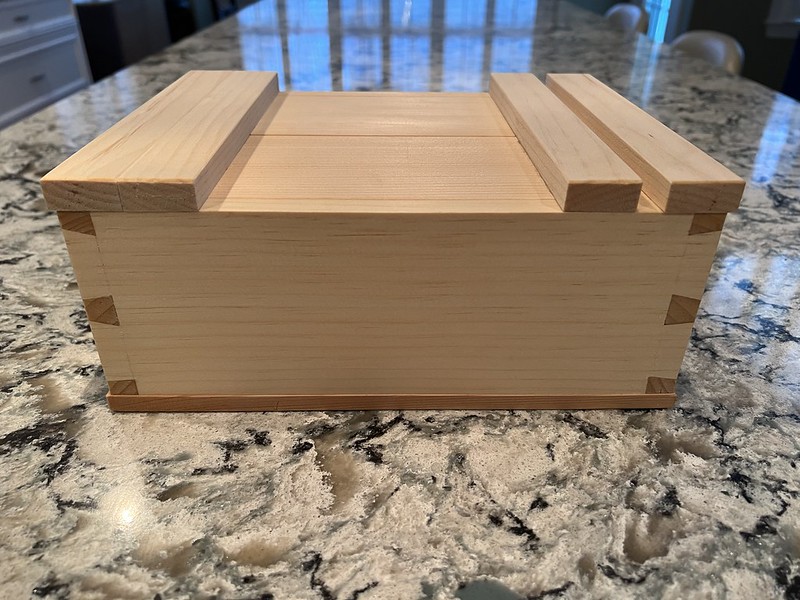
I learned how to flatten boards with both a scrub plane and my jack plane. Then we marked final dimensions with a knife, rough cut oversize with a saw, and planed to length and true. The project was an 8"x10" box, so once we had our 4 walls, we laid them out and marked a unique shape spanning each joint so we could always keep track of which corner went to which corner.
Next came marking for hand cut dovetail joints. This is a pretty fun process. We did a set of tails first then I tried to cut the corresponding pins on a scrap piece. There's a lot of skill here including accurately marking with the marking knife without letting anything slip, and I spent a long time working on getting the saw started accurately and effectively. I tried one Japanese pull saw and two western push saws and eventually got OK cutting the dovetail angles with the second western saw. My first 3 real joints on the project all basically were undercut a little and required a moderate amount of paring with a chisel to go together. But once it became clear how precise "cut to the line" with the saw means, the 4th joint went together perfectly from the saw by hand with no mallet and no chisel. I wasn't expecting that so I was taken by surprise when the joint just clicked and I looked over at Harold with a huge smile on my face. He had mostly been in waiting mode sharpening a saw or something so wasn't keeping track of my progress so he was all "OK let's get it cleaned up" and I said "it's done. It fits". Really fun feeling. There was another moment like that when I was working on practice scrap and decided I was ready to try for real and he was busy so I just went for it and then when we were fitting the joint and paring with a chisel he remarked something about "this is pretty good for a practice joint" and I said "this is the real work piece here".
The bottom was a bit silly as we ended up layout out at least twice as many screws as make sense on a box this small, but Harold was mostly about learning to make the walls and less focused on the bottom and the lid. The lid is a neat sliding latch mechanism, but we were running out of time by Thursday so he did a lot of the lid himself.
We finished it with a final pass of planing and some chamfers and a coat of shellack.